petes coffee in a cafe

3 Mandatory Food Photo Styles For Your Restaurant

I see lots and lots of pictures shared on social media by restaurant owners (such as yourself) that miss the mark when it comes to displaying the menu item in its best possible format.

I’m not talking about lighting or clarity or composure.

What I’m really talking about is the angle at which you hold you camera or phone to take the picture. I’m also talking about the style of photo you take when it comes to framing your plate of food.

What you might not realize is that you have been taking and posting boring photos of your food and maybe even turning possible guests off from eating at your restaurant.

Let’s talk about some easy fixes for these problems.

1) Get “Artsy” – Get High!

Your restaurant, cafe, bakery, etc., should be on Instagram. Not on there? GET ON THERE! 

Now, this platform is awesome not only for posting food photos a.k.a. #foodporn but it’s also a great way to get some inspiration on different styles to shoot your food.

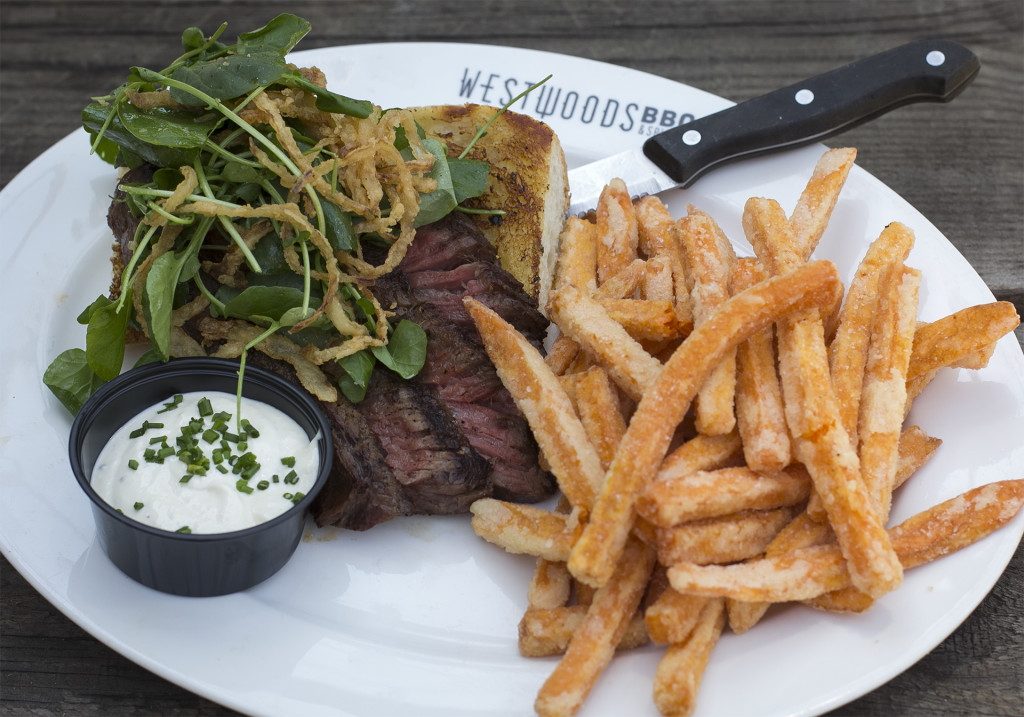
I like to use the “birdseye” style for my clients on Insta. It gives the menu items a unique look and it fits the artsy feel of Instagram.

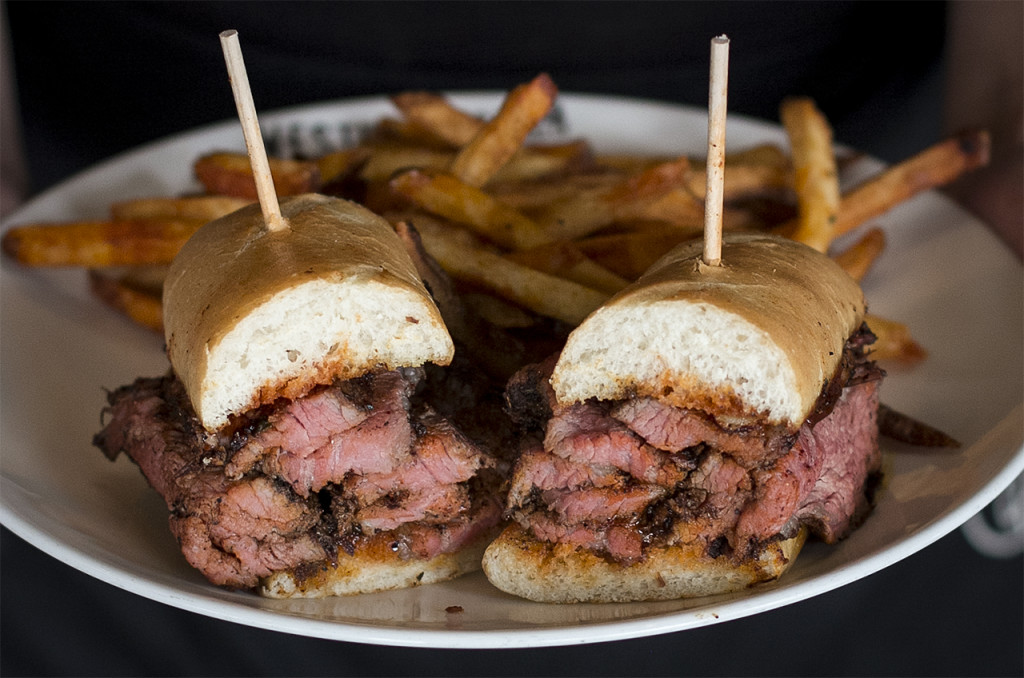
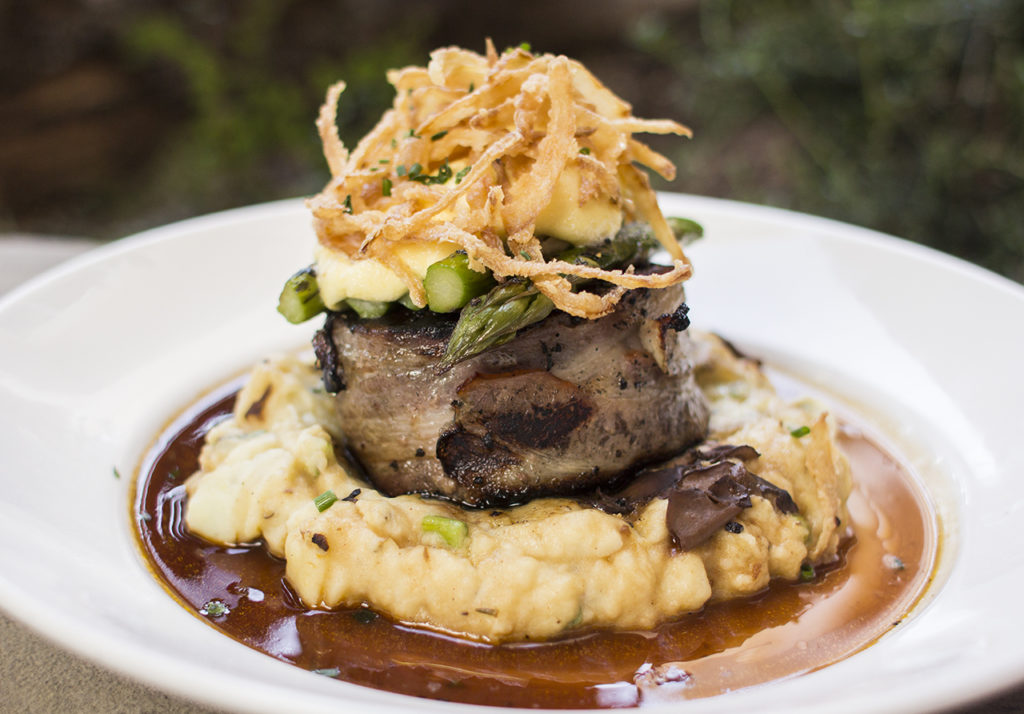
Here’s two examples of the same plate. One feels like a traditional photo and one feels a little more refined.

I like to use more traditional photos like this on Facebook.

I like to use more traditional photos like this on Facebook.

IMG_1383

I use the top view photos like this on Instagram

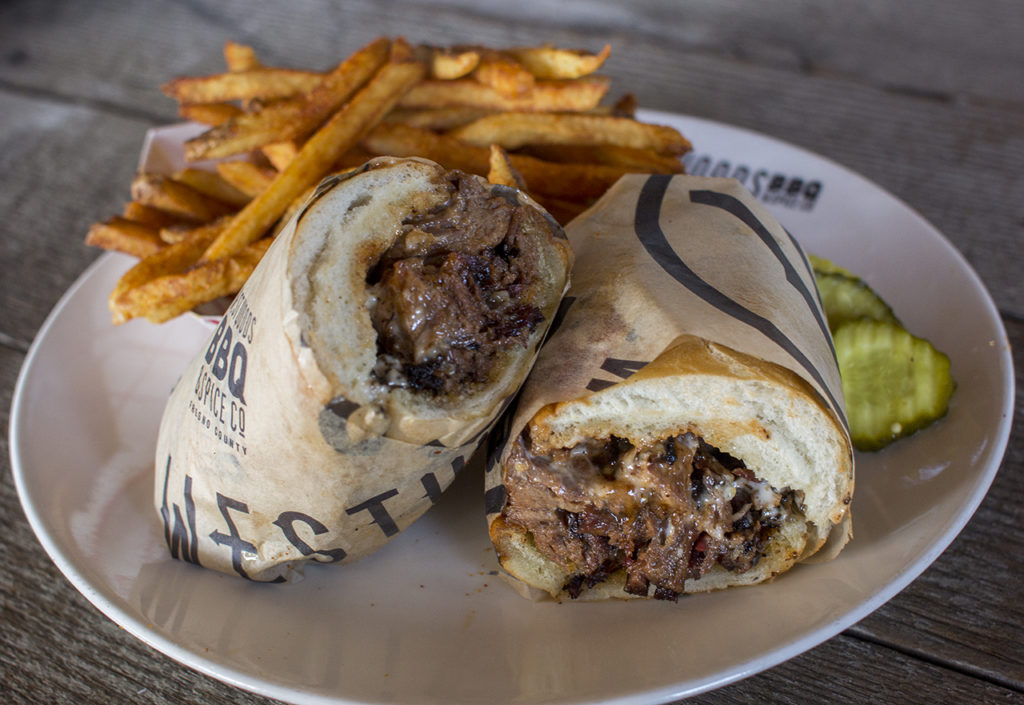
2) Fill The Frame – Fill The Belly!

Most of the time you will naturally execute this style. It’s normal to be close to a plate of food when you’re eating so it only makes sense that when you take a picture you are – in that moment – feeling the same way.

But what I want you to focus on is really getting in there and focusing on one item. It’s okay to have a little bit of the other items on the plate in the image but really get in close to one item.

Here’s a pro tip for getting a nice tight, crisp, and clear photo when you use this style. Make sure you focus and snap that pic with as little movement as possible. When you’re in close like this it is easy to miss focus – especially on a phone.

get close, focus your camera, stay till, and snap. Get a couple just to make sure.

Go from this close too…

This is where you'll feel comfortable shooting, naturally.

This is where you’ll feel comfortable shooting, naturally.

To this close…

Get in really close. When you think you're too close, get a little closer.

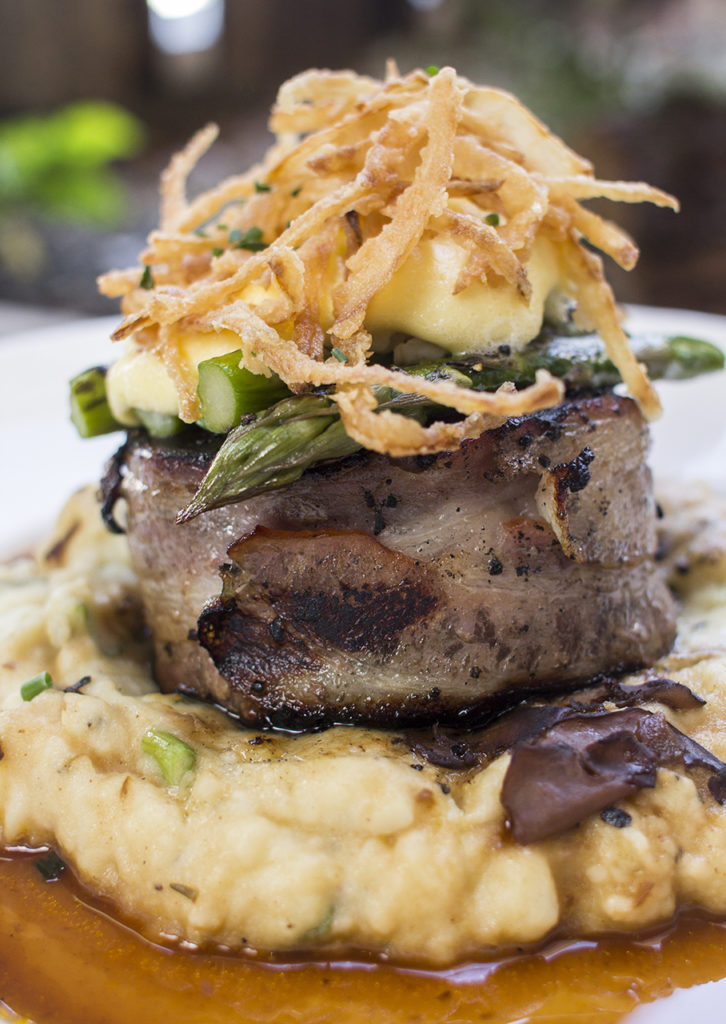
Get in really close. When you think you’re too close, get a little closer.

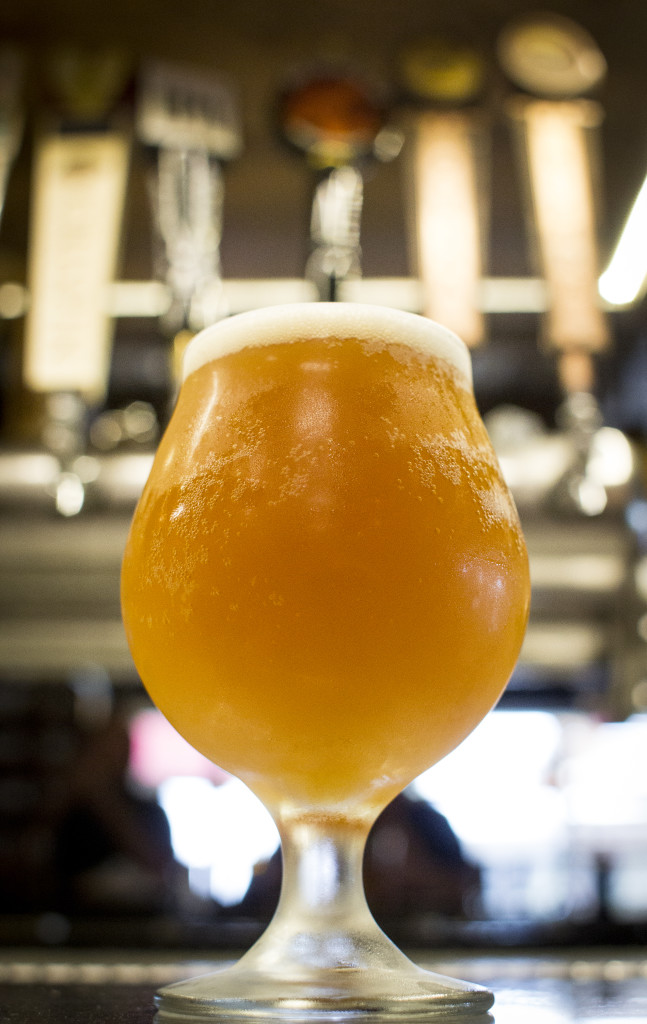
3) Ambiance – Create The Mood!

You most likely noticed that in the style above that I included some background in each image. Either there is a little of the table or the background in each photo to give the consumer a “feel” for what it will be like when they visit the restaurant.

Too many times i see restaurant owners or their agencies post photos that kill the feeling of the establishment by taking photos that eliminate the background and the ambiance of the business.

But this is really easy to fix!

When you pull your camera out and get ready to snap that pic instead of looking at the item look behind and around it.

Is it bland? Or ugly? Or *gaaaasp* dirty?

If it is STOP.  Look up, around, and behind you. Is there some place close you can move to? Maybe a window or a table that has the bar in the background?

Grab that your item and move it!

From here…

how to photograph coffee

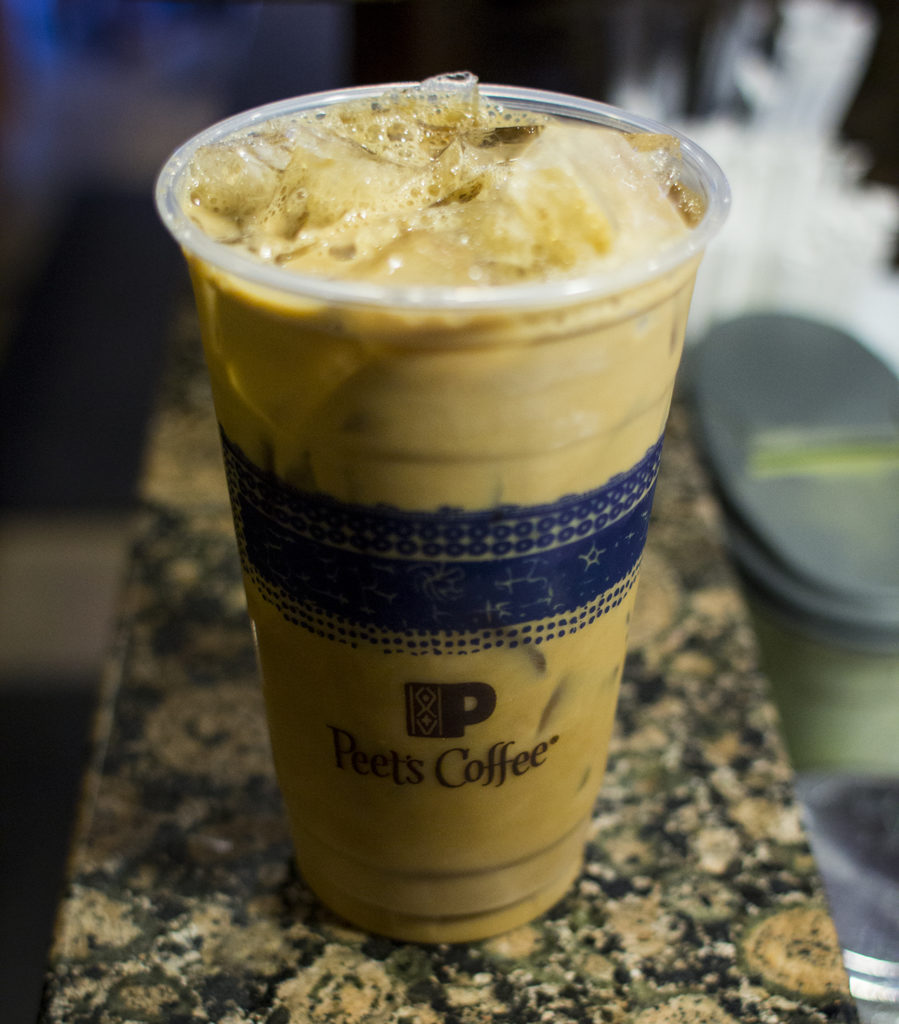
You have no idea what it feels like in this business.

To here…

petes coffee in a cafe

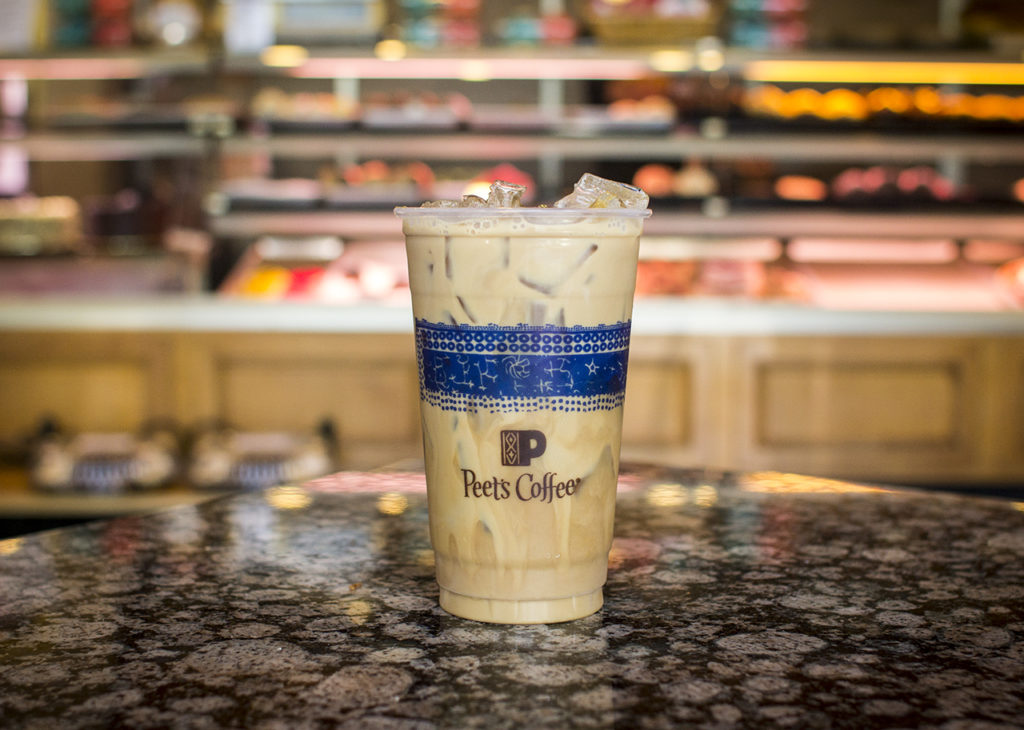
I bet you can tell I’m in a cafe or bakery now.

Take It To-Go!

So it’s that easy!

Take this tips along with you and try them out the next time you shoot some food or drinks.

Trust me, the when you post a photo using one of these styles it will stop people and get them to pay attention.

I’d love to hear some styles that you use that I didn’t mention in this post. Or if you tried one of the above tips post your photo in the comments below.

3 Important Lessons I Learned While Shooting My First Maternity Session

I had researched all my poses and ideas.

Collected images off of Google to help inspire me during my shoot.

Charged my camera battery and cleared my memory cards.

And I thought I was all ready to kill my first maternity photo shoot….

But I was wrong.

Here’s is what I learned on my first paid gig and hopefully you can learn from my pitfalls.

1) Some Locations Just Don’t “Work”

Before you scoff and say “an artist works with the problem and lives in the solution” let me say that not every setting can achieve the look you are going for.

I had this idea in my head that I was going to do this sweet silhouette style shoot where I’d darken the room down and bring in the flash from the back and another to shoot a weak light across the faces of my subjects. .

In theory it was a great idea (and I patted myself on the back for it) but in real life it didn’t work. The room I was shooting in had a very low ceiling, it was a little cramped for the space that I needed to move the flashes around, and everything was painted white.

Let it be know, sometimes you just have to try. See the results. Then kill the idea if you know it won’t work. When it doesn’t work have the tenacity to move on quickly and don’t waste your time or the clients.

2) Create A Checklist For Your Equipment

After this shoot I decided that I need to make a list of items that I needed to make sure I had no matter what kind of session I was going to be working on. Even if I just scribble down on a notepad the essentials then I won’t have to stress or deflate during a shoot when something like, say, THE BATTERIES FOR MY FLASHES RUN OUT!!! And I didn’t bring extras.

Yep, seriously this happened on this shoot.

I was crushed. It was the starting to reach the “Golden Hour” and I have been concentrating on shooting with the sky and sun in the background and then filling in the subject with artificial light when all of a sudden I noticed that I something was wrong.

I stopped. Tried to test fire my speedlites and guess what? They were dead.

Now, I didn’t let it ruin the shoot and I moved into a more natural light shoot but for me I was really bummed because I had planned this shoot weeks in advance and everything was thrown down the drain.

Make a list. Download a list. Do whatever you need to do to make sure you have all the necessary equipment.

3) Pose Your Subject, Stop Worrying About The Shot

Even with the batteries in my flashes dead, I was still stoked on the images that I was capturing with natural light.

The sun was just right. The sky was starting to take on a great hue of blue. I thought all was going well.

Then I got home and popped in the memory card and started to review my shots. I was pretty heartbroken to learn that I hadn’t focused on posing my subject and instead kept worrying about the exposure of the shot.

In many of my images it’s hard to even tell that my “mommy to be” is even pregnant! What a shame!

One thing I learned was no matter what, once you have your settings locked in focus on how you want to compose your image. Where you want to place leading lines. The expression you want your model to have. And all the other little nuances that make up your art.

So I have to know, what is one knuckle head move you’ve made when out on a shoot?

IMG_0911 IMG_0957 IMG_0983 IMG_0990 IMG_0997 IMG_1006 IMG_1062 IMG_1074 IMG_1079 IMG_1096 IMG_1097 IMG_1098 IMG_1106 IMG_1112 IMG_1152 IMG_1167 IMG_1181

3 Little-Known Uses for Yelp Check-In Deals

YELP. The new four letter word for local businesses.

Let’s face it, you either love Yelp OR hate it

Chances are, you hate it.

Regardless of how you feel about Yelp there are some serious benefits for using it!

Let’s focus on what your business can be doing today to help increase your exposure online.

The New Coupon

Ever heard of coupons? (You: Yes) Ever used them to help you increase awareness and sales? (You Again: Yes)

Check-in offers are the new coupon.

You might be cringing because you hate the fact of discounting your services to gain new customers, but stick with us.

If you’d like to setup a nice little discount to help generate some buzz it’s super easy to do

  • Login to your business for yelp account.
  • On the left sidebar you’ll see “Check-In Offers” click that.
  • In the main screen is a red button to “Create a Check-In Offer.”
using yelp checkins for your business

Feel free to experiment with all the options.


You have the option to choose 4 different types of offers. Test these to see what works best for your business.

You can check out samples on the right and view an example of the offer you are creating down below.

1) Promote Happy Hour

Every business (Restaurants, Coffee Shops, Bars, etc.) can incorporate a “happy hour” for their slower parts of the day.

List your Happy Hour deals as a check-in offer to get some extra exposure.

If you run a business that sees dips during seasons try running a “Happy Hour” special for the month!

2) Increase Your Average Ticket

Push that new appetizer or dessert by adding a check-in deal if the patron orders two entrees.

Get rid of items that may be close to expiration or that you have to throw out at the end of the day.

A donut shop could throw in a couple of donut holes if people purchased more than one item. I’d be game, I love donuts though.

give away product with a check-in deal

After your deal is setup you can monitor your stats.

 3) Sale Tickets To Your Next Event

If you ever host an event at your business this is a sweet idea to sell some extra tickets.

Instead of offering Early Bird pricing you could do a 2 for 1 check-in deal that is essentially the same discount.

Or, you could add an offer on the “fixed price” option for your tickets so that way people know they can still buy them.

    sales tickets with yelp check-in deals

Why You Should Be Using Check-In Deals

Almost every popular platform on the web offers a check-in deal. These are great because when a person uses this feature they broadcast out a vote for your business.

They don’t cost you dime other than the discount that you offer.

Most platforms make it really easy to share your deal on Twitter or Facebook so your offer has a better chance of going viral.

The general public loves deals!

So go claim your Yelp page if you haven’t, setup a check-in deal, and start measuring your success!

As always if you have any questions or need help with this just let us know and we’ll be more than happy to help you…for FREE.

Please take a second to share this on your favorite network…

3 Easy Steps For A Customized Facebook Restaurant Menu (no coding needed)

Facebook has, somewhat quietly, rolled out the option for restaurants to add their menu to their Facebook page via a PDF.

While this may not be an earth shattering update it does relieve the need to install a third party app and then take the time to customize the menu and update any pricing or menu changes one at a time.

I see this new option as a Godsend for restaurant owners who want to get their menu online, fast.

While the process is fairly simple there are some hang-ups with the current system and its availability that should be mentioned before I show you how it’s done.

First, this option is only available for pages that have “self-identified” as a restaurant. Which according to comments online means hotel owners who offer a menu through an in-house café or room service do not have the option to add their menu.

Second, you can only upload a menu via PDF (unless you are using Constant Contacts – Single Platform) as detailed on Facebook’s article. At this time no other file format is allowed, which may not be a big deal unless you haven’t changed your menu in last couple of years and the only digital version you have is a JPEG or some other file. Personally, I know a lot of restaurant owners who fall into this category. Hopefully a multi-type file option is available soon, but we’ll see.

It should also be mentioned that your PDF be in one file. It can have multiple pages in the file, but it must contain your whole menu if you want a user to be able to view everything you offer.

In short you can NOT upload multiple PDF files.

And lastly, this option is only available to businesses in the U.S. and Canada. Facebook’s Timothy Rathschmidt has said “For now it’s U.S. and Canada. We’ll look to roll it out to more countries, but no timing on that.”

Now let’s take a look at how easy it is to add your restaurant’s menu.

1)      Navigate to the left sidebar on your page and in the “About” section you should see your contact information and an option to add your menu.

1-add menu (via westwoods)

If you do not see this option in the sidebar you can also navigate to the “Settings” tab at the top of your page and then access the “Page Info” option on the left inner sidebar and navigate to “Menu” in main panel.

2-admin area upload (via westwoods)


2)      After you click on either option above you’ll be presented with a button to upload your file (please note that a 1MB file size is the maximum allowed).

3-click top level reveal upload (via westwoods)


3)      Click “Save Changes” and your menu is now live on both desktop and mobile applications!

4-after upload then save button (via westwoods)


Even with some minor inconveniences I must say Facebook has done a great job of making it extremely easy to upload a menu to their platform.

What’s this mean going forward?

Maybe we are on the verge of something significant here, a robust option for online ordering? This wouldn’t seem so far off if Yelp had not acquired SeatMe recently.

Or maybe it’s just Facebook’s way of trying to attract more business owners to the platform.

What do you think? Tell me in the comments below.

Why Your Restaurant Needs To Be On Instagram

Instagram. It’s a restaurant owner’s playground on social media or at least it should be!

Your food is your product, you know this. And you should be marketing your product on extremely visual platforms online…

And the main social media platform you should use it Instagram.

Why?

Well, here is why:

  • Instagram is the fastest growing social media platform with 200 million users >>Tweet This<<
  • 37% of 18-29 year olds use Instagram >>Tweet This<<
  • 80%  growth in brand use of Instagram from 2012-2013 >>Tweet This<<
  • 6.5X higher engagement rate on Instagram than Facebook, G+, and Twitter…combined! >>Tweet This<<
  • 98% higher engagement rate on Linkedin when you cross-post your Instagram photo >>Tweet This<<
  • 30% engagement for images with real customers using products on Instagram >>Tweet This<<
  • 6% higher engagement with users when you post images to Instagram on Sunday >>Tweet This<<
  • 99% of engagements are “likes” on Instagram >>Tweet This<<
  • Indy 500 reached over 52 million people on Instagram & Twitter with their hashtag campaign >>Tweet This<<
  • Use phone numbers or unique link shorteners in photos on Instagram to track ROI >>Tweet This<<


Quicksprout Instagram Inforgrpahic

The ABC’s Of Instagram For Restaurants

Be selective with the images that you repost on your Instagram account. Don’t be anxious to repost every picture, instead, focus on the “best” user generated content.

When you display your product in a poor light this will adversely affect your business.

Bad pictures, bad perceptions.

There’re a couple of businesses in the town that I live that seem to repost everything (they are the inspiration for this post) that comes across the radar.

Blurry.

Bad lighting.

Bad angle.

Bad shot in general, etc, etc.

Just because somebody has the Intsgram app DOES not make them a photographer.

And just because someone doesn’t own a professional camera doesn’t mean they aren’t artistic. (hipsters take note)

Identify The Best

The beauty of Instagram is that talented people can create beautiful images of your product and service for you on Instagram.

But the flip side is, lots of untalented people can create lots of horrible images for your product.

Below are the ABC’s to help you remember if you should repost an image when you find one…

The ABC’s of High Quality Pictures:

Artistic – fun angles, maybe some other props like a glass or fork in the meal
Bright – look for images with great lighting, preferably bright
Clean – not blurry, crowded with other objects, or far away with little detail

Get Permission

Make sure you get the users permission to re-gram their photo on Instagram. Even though you credit them in the comments it is important to first ask.

Disneyland does a great job of this.

Pick any photo in their feed, they have tons to choose from that is why their whole stream is user generated, find who they credited, go that user’s profile, find the pic that was regramed and wah-law there is the consent to share.

The ABC’s of permission:

Ask – ask the user for permission in the comments of the original pic and tag them so they get a notification.
Bail – Scrap the original caption and add a short unique headline of your own. Most of the time people post pictures with no thoughts of headlines because that’s just not where their head is at.
Credit – us this format to apply credit after your headline (photo: @username)

Additional Enchantment

Let’s say you found a great pic and it falls into the first set of ABC’s of regraming but…

there are elements that are just a bit off.

You can use an app like Snapseed to bring out some of the details or lighten some shadows.

Don’t do too much editing though.

You want to make sure to respect the original Instagramer.

Plus, you are going to take some heat if you alter it and end up posting a picture that looks horrible.

Think about how you would feel if a brand edified one of your photos and made it look horrible and then posted it saying it was yours originally…

yeah, you are probably not going to be a happy camper. I know I’d be upset.

The ABC’s Of Editing:

Authentic – keep the picture as close to the original as you can. Try not to touch it at all if you can.
Beautify – only add subtle details to your edits like details and lighting, if you have to edit it at all.
Conservative – this is someone else’s art. Do NOT add filters. Less is more so be wise when touching these originals.

But How Do You Find User Generated Content

This can be both tricky and simple. Depending on how lazy you are that day.

For me it’s 50/50. So I try to give it my all once a week.

1) Use the star feature on the IG app and type in your brand name and search hashtags.

2) Post a picture and add your business location. After it is posted tap the location tag just under your account name when you are in the feed.

Side note: Great Local SEO signals here too, so make sure that you tag your location always. Even if you arent there you can search you business and still tag it.

If you can’t find your business then you need to either claim and optimize your foursquare listing or create a foursquare page for your business.

Other great app’s to use are statigram, hootsuite (you can search hashtag’s with the instagram add-on), and worldcam.


Your Turn

Get out there and find some user content. Ask permission to re-post and then do it.

Make sure that you tag the original IG’er in the comment section and add your business location.

Try to find one picture a week to re-gram.

Westwoods BBQ Social Media & Photography

I’ve noticed that a lot of people ask my clients who does their social media.

I don’t normally post my clients because I work as a transparent partner that passes off my work as the clients.

But…as of late I have heard that other social media companies in the Fresno area have been claiming that they are responsible for the both the creative ideas and above average growth on Facebook, Instagram, SnapChat, etc. through professional photography (mine) and highly optimized search techniques and paid advertising channels.

So who do I represent?

Westwoods BBQ

Pismos Coastal Grill

Yosemite Ranch

The Standard

Pacific Martial Arts

I don’t work with just any company. I hand-pick my clients. Or they handpick me through negotiations and communications.

If you’d like to contact me to discuss your current campaign or you’ve been duped by another company passing off my work for theirs, give me a call at 559-458-3929.

Here’s some professional photography I’ve done for example:

IMG_1415

tri-tip-sandy

open-face-waygu

IMG_6850